Showing posts with label baby. Show all posts

Sunday, April 15, 2012

Caterpillar Birthday!

My daughter and my good friend's daughter turned 2 in December.  We planned a joint birthday for them using the theme The Very Hungry Caterpillar.  Here are some highlights from the party.  Most of the ideas are from Pinterest!

Here is the invitation.

The first circle is the caterpillar's head.  The second circle has the poem:
We can hardly believe
two years have passed.
Our little caterpillars 
have grown up so fast.
Join the Dunnes and Heinleins
as we debut
Kiah and Audrey 
are turning TWO!

The third circle has a photo of each girl, and the fourth circle has the party info.  I used mini brads from Michael's craft store to attach each circle.  I then rotated the circles so they were stacked and slipped it in a large greeting card envelope to mail them off to the party go-ers.

I put an invite in a frame and displayed it at the party.  Making 20 of these invites took FOREVER, but they are so cute it was worth it.
 

A couple weeks before the party, we got the kids together and made these artworks.  Celia (the other mom and party planner) bought these canvases, acrylic paint, and toddler friendly paintbrushes.  I made the butterfly body forms with brown construction paper and glued them on top of the paint once it was dry.  I also had googly eyes to add once the art was dry.  We made this art as samples and displayed them at the art table at the party.  All the guests who came got to choose which artwork they wanted to make, make it, then take it home as their party favor!  It was a big hit with the kids AND adults alike!

I later hung the art in my kids' room as display of their artistic ability!

I made the girls birthday shirts out of felt and fabric.  I bought the plain white shirts at Kohl's.  I loved the little ruffle detail near the neckline.  I cut out the number two from polkadot and strawberry fabric and ironed on interfacing to the back, then ironed it to the shirts.  I zigzag stitched all around the two to adhere it to the shirt.  I then used my embroidery attachement to embroider the name letters onto different colors of felt.  The eyes on the caterpillar head are just little zeros!  I cut circles around the letters, trying to get the letter as centered as possible.  I used my 2" circle punch to make a paper circle template that I pinned on top of each letter, then cut around.  This worked well, but some letters are more centered than others.  You can tell it is handmade! :)  I then sewed each circle to the shirts using coordinating thread.  This part took awhile to change the top thread and bobbin each time, but I am really happy with how it turned out.  I wasn't going to sew the purple antennas on the caterpillar heads, but in the end I did.  


Here is Audrey in her shirt.  You can see the antennas.

Celia bought green tutus for the girls to wear, too.  They were adorable!

My mom also crocheted the girls caterpillar hats.  Here is Kiah modeling hers at her house:

I bought a book of the Very Hungry Caterpillar just to cut up and use for art.  I got a butterfly punch at Michael's and made these two frames: one for each girl to take home after the party.


I also used the book to make signs for the food table.  We served food from the book!  The big lollipops are from Dylan's Candybar.  Instead of an actual pie, my friend Janae made pie pops - they were adorable and delicious.  And instead of cupcakes, I made a table runner out of cupcake fabric.


Celia made delicious sandwiches with the salami and swiss cheese, and in honor of the leaf the caterpillar eats to make his tummy feel better, we had salad.

I made name banners for each girl and displayed them in the dining room with the food.  Here is Kiah's.  The letters are punch-out letters from a teacher supply store.  The colored polkadots around each letter are the girls' fingerprints!

 Here is Audrey waiting patiently for her cake.  My mother-in-law is a fabulous baker and made this cake.

Here I am enjoying the party with Audrey, my friend Carla, her daughter Kennedy, and my other friend Erin.  A ton of work went into pulling this off, but everyone had fun, the food was good, the decor was cute, so I was a happy mama!

 No, stripes nor black and white clothing were a prerequisite for attending the party.  My friends and I just have very similar taste in clothing!  Ha!


Monday, December 19, 2011

Craft It Forward 2011

On January 4, 2011, I promised to make something for the first 5 people who commented on my Facebook status.

So finally, the end of December, I am ready to mail them out!  Thank goodness for Facebook's new Timeline.  The first time I went to check who exactly had commented on this status, it took me over 30 minutes to scroll all the way back.  Now, I just click on 2011, then click on January.  Easy, peasy!

Now on to the gifts...

For Tia, a jersey knit scarf, sewn with elastic thread in the bobbin so that it would ruffle a bit.  I got the idea from this tutorial.  Since I used jersey knit and it doesn't fray, I didn't hem the edges.  It's really light weight and will be great in the late spring or summer!

For Laura, a shirt for her son, inspired by the Oregon sticker on my car.  I printed out a map of Oregon, then cut out the shape from white felt and sewed it on a little boys black shirt with a straight stitch.  I cut out the green felt heart and sewed that on top with green thread and a straight stitch.  Really easy and super cute!

For Shannon, a fun coffee cozy.  I've made them before, here.  If she doesn't buy coffee drinks often at Starbucks or other places, she can also use this sleeve on Kleen Kanteens (those things can get really cold if you put ice in them) or on to-go coffee mugs.  I used the left over fabric from making Kara's oven mitt and hot pad bridal shower gift and top stitched it with a cute flower stitch on my sewing machine.

For Wendy, a onesie for her baby girl.  I got the idea from this pin on Pinterest.  I had actually originally pinned the inspiration from one of Wendy's boards, so I hope she hasn't made one for her daughter yet!  The flower is from this tutorial because I wanted it to be permanently attached to the onesie.  If Wendy wants to turn it into a pendant, she just has to snip the threads and glue or sew it to a pin from the craft store.

For Kelly, a super hero cape for her daughter, Greta.  I also made capes for Nathan's birthday last year and Greta's brother was one of the attendees who received one.  I'll have to do a tutorial on those soon!  Kelly is also a teacher and last year her class wrote an imaginative story about Super Greta, a brave and courageous toddler.  In the story, Super Greta's cape was blue and red.  I made her real cape blue and purple, because purple is her favorite color!  I even practiced using my embroidery attachment to embroider "Super Greta" on the Superman emblem.  It turned out much better than the last time I embroidered something for Greta! Here is the finished cape in the car, on the way to the post office!

So, moral of the story, if I participate in Craft It Forward 2012, I will start these projects WAYYYYY earlier! :)  I'm such a procrastinator, it's not funny.

What have you been working on lately?


Sunday, March 13, 2011

Giraffe Diaper Cake

I went to a baby shower last week that had jungle animals on the invitation.  So, I thought a giraffe themed diaper cake would be adorable!  My idea was to find a giraffe print fabric for the burp cloth and matching onesie.  I thought the mom would love how graphic it was and that it wouldn't be too babyish.  She also doesn't know what she's having, so the giraffe print would be gender neutral.  I ended up finding a perfect giraffe print flannel at my fav Fabric Depot (where I've gone for fabric for this project and this project).  Here is the onesie and matching burp cloths I made:
I decided to put a star on the onesie, thinking it would be a good graphic for a boy or a girl.  I also sewed on the new fabric labels I just got for my Etsy shop, Pic-Nik Designs.  I got them here.  Super fast shipping from Australia, great prices, and wonderful customer service.  If you want to get customized fabric labels, I highly recommend them!

Back to the diaper cake.  Since the new mommy and daddy-to-be live in Kentucky and requested gifts to be travel friendly, I only made them a one tier cake.  I used a half pack of Seventh Generation diapers and gave them the other half in a  gift bag (so they would see which brand and size the diapers are).  I wrapped the diapers with some giraffe printed ribbon I found at Joann Fabrics and added some green washcloths, folded to look like flowers (I knew from their registry they were going with a gender neutral green color palate for the nursery).  I also added a yellow stuffed giraffe from Target that has a little wind-up thing on the side to make it play lullabies (kinda like this one) and a little giraffe rattle from Babies R Us. This is kinda like the rattle.  Maybe I couldn't find the original one online because I had bought it in the store a couple months ago?


When I walked up to the baby shower, I saw a giant wooden giraffe on display on the front porch, wearing a bib.  "Score," I thought.  "My gift matches that giraffe."  I then got inside and noticed the mommy-to-be was wearing a giraffe printed dress.  Not only did my gift match the decor, it matched the mommy!  Perfect!  500 points for me!

Saturday, January 8, 2011

Scribd

I just joined a website where you can upload documents for free and share them with your friends!  Many other blogs I follow have been giving away calendars and posters with fun quotes on them.  I decided to join the band wagon as well and have uploaded my own!  There is a poem called "Babies Don't Keep" that I've been wanting to do something with.  Every time I look at Audrey so peacefully sleeping, I think of it.
Photo taken by Carrie O'Callaghan
Inspired by Scribd, I finally typed it up with fun colors and font and uploaded to share with you all!  Let me know if you'd rather have a word document so you can change the colors and fonts to your liking.  Maybe you have a poem you've always liked.  What is it?  Are you inspired to type it up and share it on Scribd as well?
Babies Don't Keep

Wednesday, December 22, 2010

Audrey's Birthday Bash!!

Audrey's first birthday party was last Saturday and I did a few DIY projects to get ready for it.

First, I made a paper banner that I hung across the mirror in our dining room that says "Audrey".
I used my paper punches to create this out of white, pink, and green card stock and a sheet of white scrapbook paper with multicolored polka dots.  I have a 1 in circle punch, 2 in scallop punch, and a 2 3/4 in circle punch, all by EK Success.
I got the little owl from a collage sheet of 1 in round owl graphics from Nice Designs on Etsy.  It cost $4 and she emailed it to me that day!  They are printed out on white card stock.
I used some scrap-booking paper I already had for the letters.  I traced a set of letter stencils I had at school and cut them out on the pretty paper.  I then took an exacto knife to make slits at the top and threaded the ribbon through. 

Another thing I made were the party favors for all of Audrey's little friends.  I made personalized bags that I put a sheet of owl stickers in and a handmade owl onesie (or shirt for the big kids).
The bags had a green circle for boys and a pink one for girls.  Then they had a scallop polka dot with owl in the middle and I hand wrote their names on the circle.  I then glued it on a white paper bag that I got in a set of 6 at JoAnns.
 The onesies where fun to make.  I asked each mom which size their kiddo wears.  I then picked out the pink, green, and brown polka dot fabric for the girls and a green polka dot fabric for the boys. 

This was my inspiration for the onesies.  This one is from Presents of Mind, a cute little shop on SE Hawthorne in Portland.  It was $20, so I knew I could make it for cheaper.  I got Carter's and Gerber onesies on sale at Babies R Us and the fabric on sale at The Fabric Depot (a HUGE fabric store in SE Portland).  I traced the owl onto webbed interfacing and ironed it on the fabric, then cut out and ironed onto the onesie.  I zig-zag stitched around the owl, then straight stitched up and back for the wings.  My onesies didn't have the little feet (I thought they looked a little weird) and they also didn't have eyes (I tried one and it is REALLY hard to zig-zag in a small circle!)

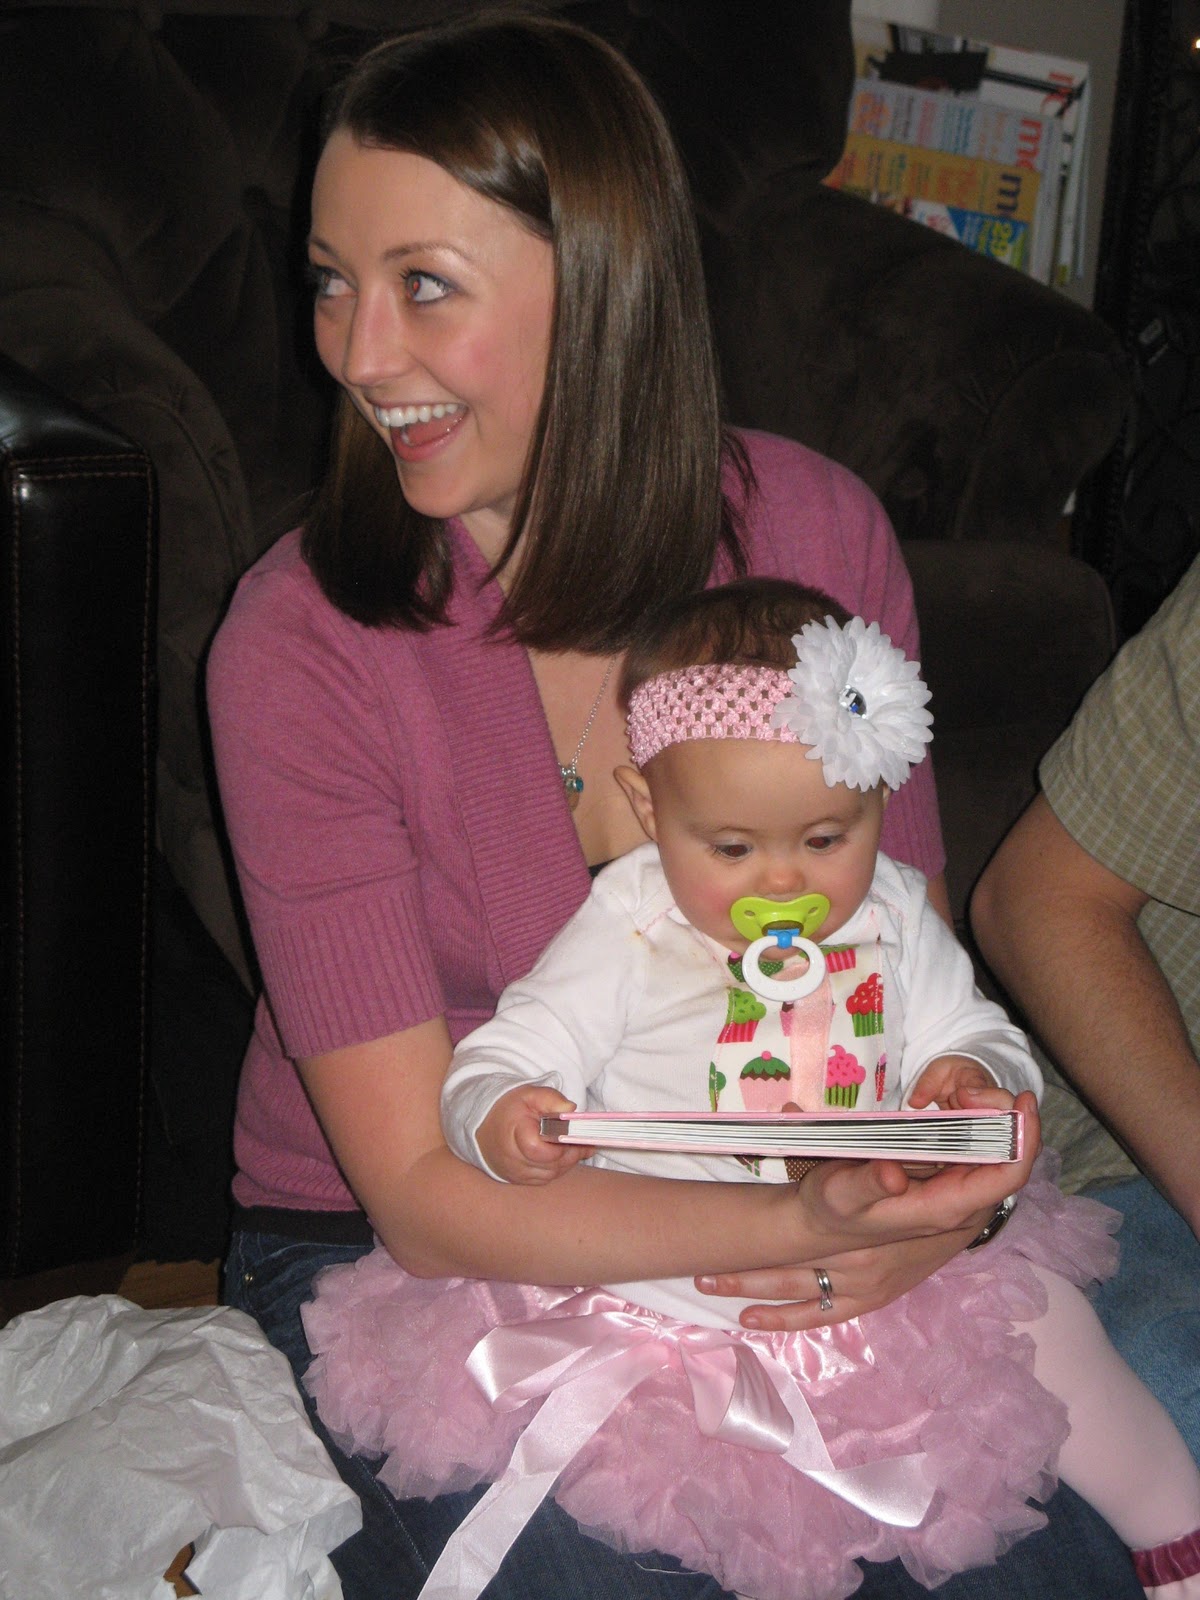
Audrey had an owl onesie as well.  Her's was made out of cupcake fabric and had a pink felt number one stitched in the middle instead of wings.  I used a fancier onesie, the fabric had a little bit of texture to it and there was a bit of pink stitching along the neck line.  The birthday girl needed her shirt to be special!
 She also wore an adorable headband made by my friend Michelle Armstrong, a pettiskirt tutu made by Boutique Hermosa on Etsy, and adorable Robeez-esque owl shoes made by Wildcubs on Etsy.
 I just love this tutu.
The shoes are adorable.  Robeez doesn't make shoes with owls on them, so these were so perfect!

The last was the food.  Unfortunately I was so busy, I didn't snap any pictures of the food table.  I asked a few of my friends to bring an appetizer to share and luckily, no one brought the same thing!  The food was so good!  I made pink punch that was in a pretty punch bowl and put out cute plates, cups, and napkins that I got at Amazon.  I also put out some sippy cups, plastic bowls, and baby spoons for the babies in attendance.  I had baby snacks on the coffee table and applesauce on the food table.  The babies got to eat, too!  My mother in law made adorable and delicious pink cupcakes in silver cupcake liners.  I made paper owl cupcake toppers for all of them, kinda like this one.
Mine were the scallop punched polka dot paper with a 1 in owl circle glued in the middle, just like the banner and treat bags.  I glued them to a white lollipop stick and put them in each cupcake.  I arranged the cupcakes in my white cupcake stand.  I can't believe I didn't take a picture of them!  Here's a tutorial if you want to make some of your own.

I asked my mother in law to also make Audrey's cake.  My idea was for her to have a giant cupcake on her high chair.  My MIL thought that sounded crazy, but she obliged and borrowed a cupcake pan from a friend to make one.  It turned out soooooo adorable and Audrey loved it!

Happy Birthday to my sweet baby girl.  She makes me so happy and I can't imagine my life without her.  I hope all of our guests had a nice time at the party.  We wanted them to feel as special as we do to have Audrey in our lives!

Thursday, November 11, 2010

New wall hanging for the nursery

I finally finished Audrey's new wall hanging in her room:

The room used to look like this, with the crib bedding quilt hanging above the crib, the ladybug mobile on the right side of the crib, then Nathan and Audrey's 4 month hand-prints hanging to the right of the crib:

I took down the quilt, added the bumper back inside the crib, moved the ladybug mobile to the left side, and added this beautiful butterfly mobile to the right of the crib.  The handprints were moved to the corkboard I have next to the door to showcase Nate's artwork from preschool.

Here is Audrey's side of the room with the changes:


Here is how I made Audrey's hanging name.  I started with wood letters from Michael's, some sand paper, and glossy white spray paint.  I lightly sanded each letter smooth, then sprayed them with a couple coats of spray paint.  Make sure to allow for drying time.


Then I bought some pink and green ribbon at JoAnn Fabrics and got out the trusty staple gun.  I stapled the ribbon to the back of the A, then hung it from the curtain rod that was left over from the hanging quilt.  I just eyeballed how long I wanted the letter to hang, cut the ribbon and stapled the second piece to the back of the letter.  I measured out the rest of the ribbon using the first one as a guide and stapled them to the rest of the letters, alternating from green to pink with each letter. 

I then looped each ribbon over the curtain rod and pulled it through to hang.  Here's another angle of the room, with the dresser and diaper changer in the background.
Break down of cost:
6 wood letters - $12.54
Sandpaper - already had
Spray Paint - $5.59
2 spools of ribbon - $5.58
Staple gun & staples - already had

Total cost: $23.71


 What do you think?  What else does it need? I thought about lowering the curtain rod so the letters hang a bit lower.  But I didn't want Audrey to be able to reach them and pull on them and I don't want to put more holes in the walls!

Sunday, October 3, 2010

Another Mill Park baby shower

Here are some fun pics from Laura's baby shower that I helped throw.  We wanted a woodland theme, so notice the pine cones, brown, blue and green colors, and the cute baby food jar favors filled with seeds.  Of course Carla and I made another diaper cake.  Details at the bottom!

 
Mama Martinez

 
Yummy cake from the Johnson Creek Fred Meyer.  Apparently they have an amazing bakery!

 Friends on maternity leave came to visit: Katie & Baby Nash
 Abby & Baby James
                        Carrie & Baby Ella

 Playing a game: Creating baby Grayson's first ABC book!
  
Game winners: Laura's favorite pages!

 Baby gifts!

 Diaper cake!  Laura's baby bedding has little lambs on it, so naturally we needed a lamb for the top of the cake.  It is decorated with rolled up washcloths, a handmade crinkle toy (I forgot to take a picture of it, but you can see a similar one here).  Inside the cake is a really soft blue and white star blanket and this super cute onesie I made.  I've never done the tie before, but I've really been wanting to.  I think it turned out so cute!